Compare Repository
Tracking and Comparing Changes in Qlik Sense Applications
Developers rely on smooth integration of their changes into the master version of a Qlik Sense application. Before requesting to merge these changes, it's vital to compare them with what's already in the master version. This guide offers a simple step-by-step process to help with this task.
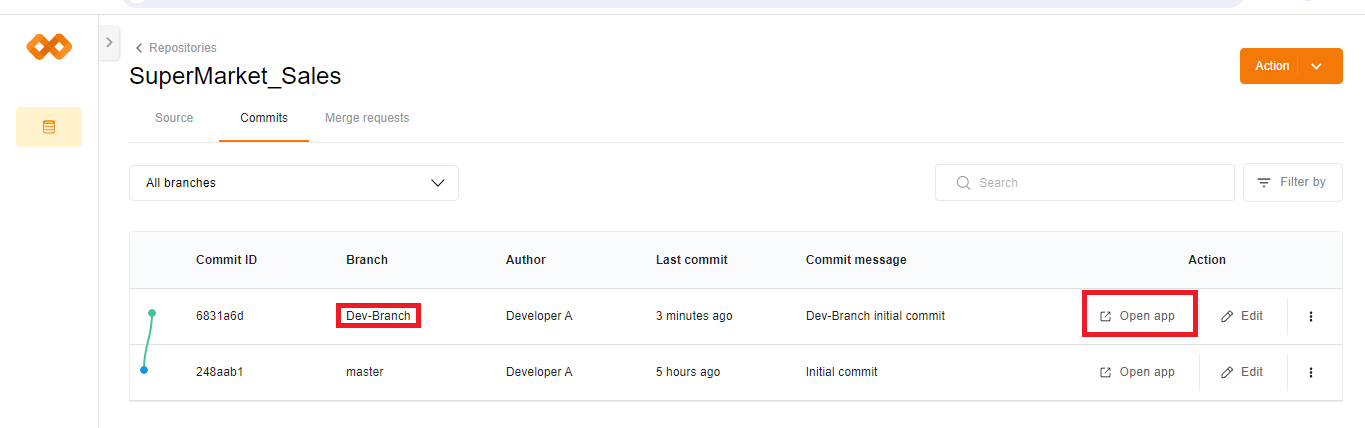
1. Accessing the Application:
- Begin by logging in as a developer and navigating to the repositories page.
- Locate the branch you've created by cloning the existing repository and click on the 'open app' button to access the application associated with your branch.
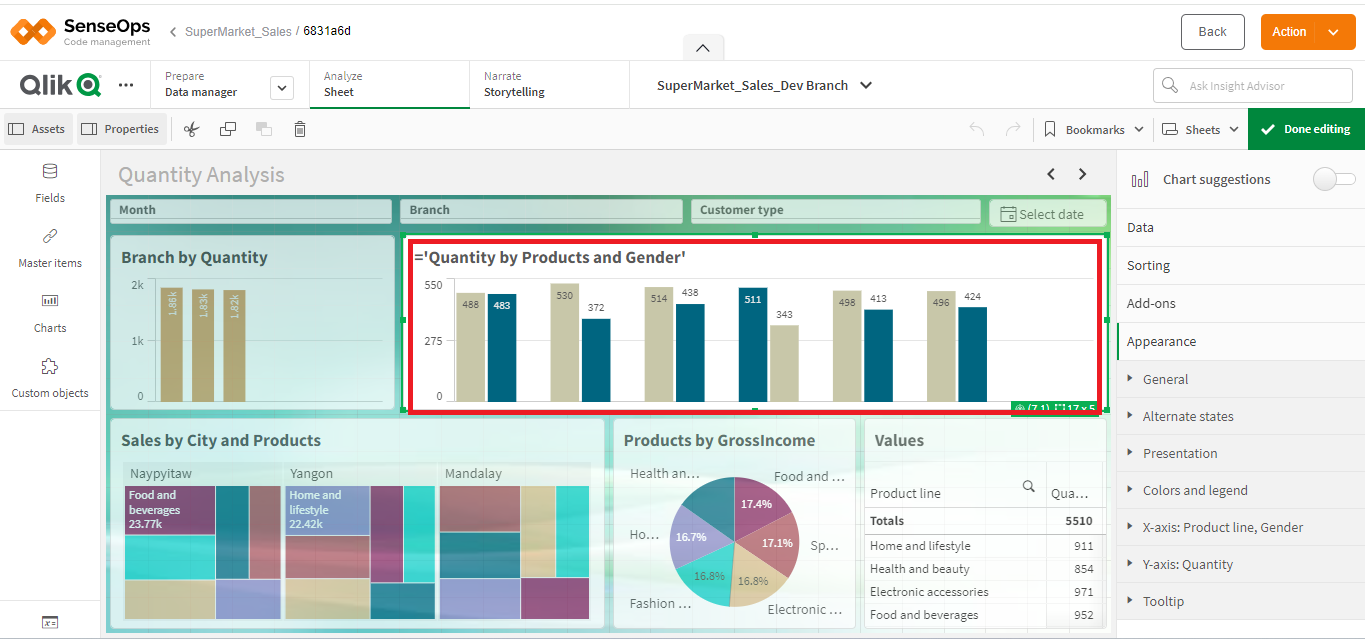
2. Making Changes:
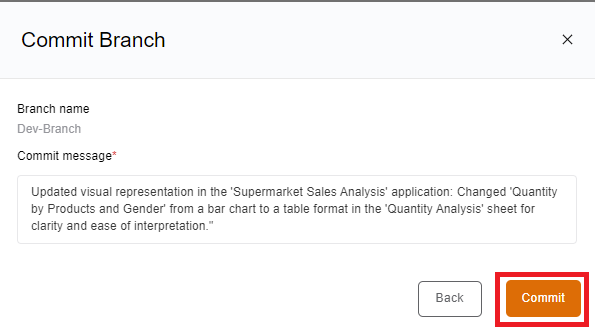
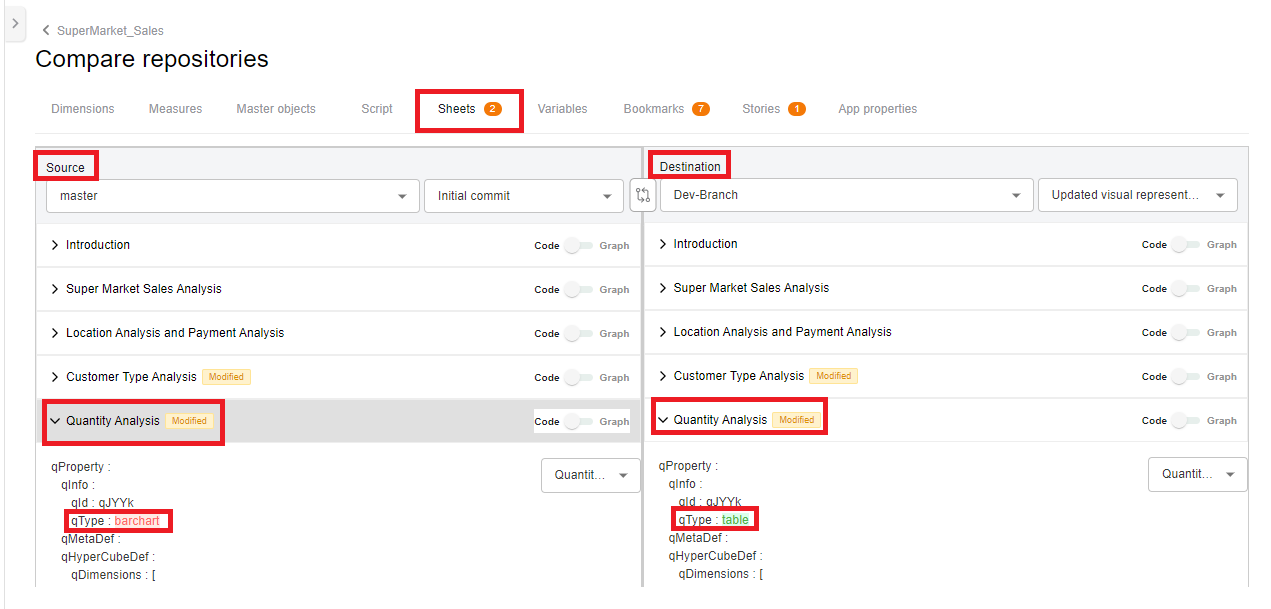
- Implement the required changes in the application according to the project team's specifications. For instance, in the "Supermarket Sales Analysis" application (a sample application created for explanatory purposes), within the "Quantity Analysis" sheet, the developer updates the visual named "Quantity by Products and Gender" by changing the visual representation from a bar chart to a table format, as per the project team's request.
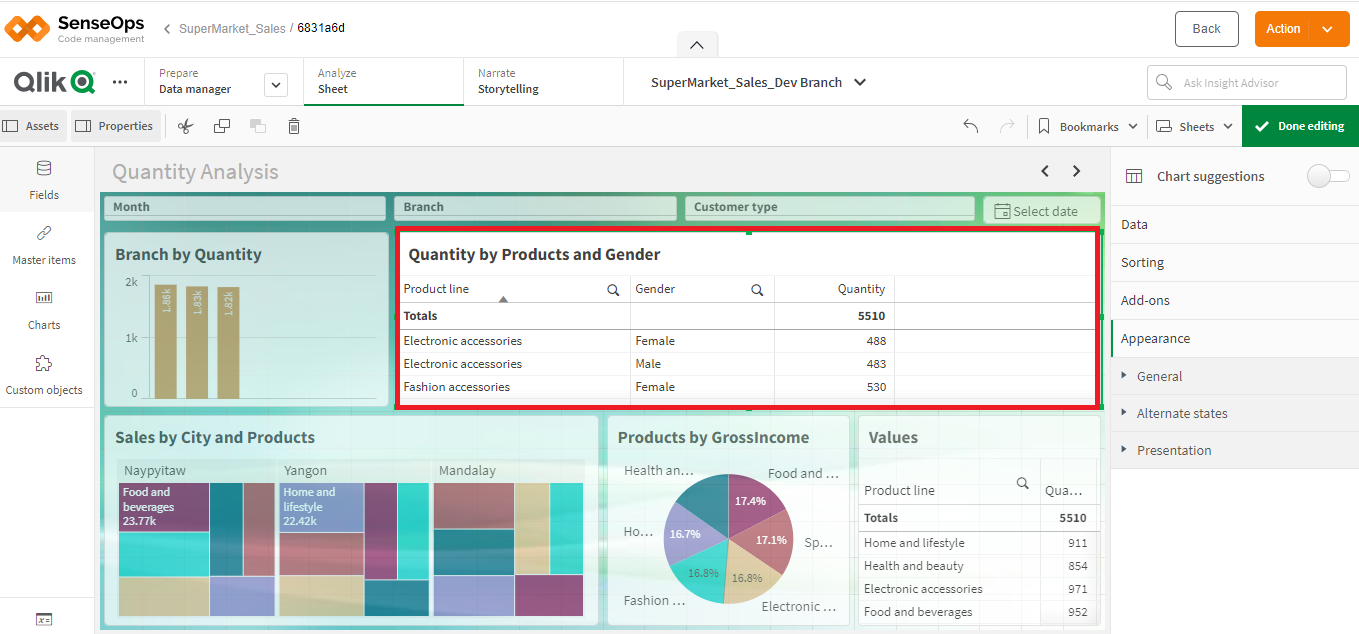
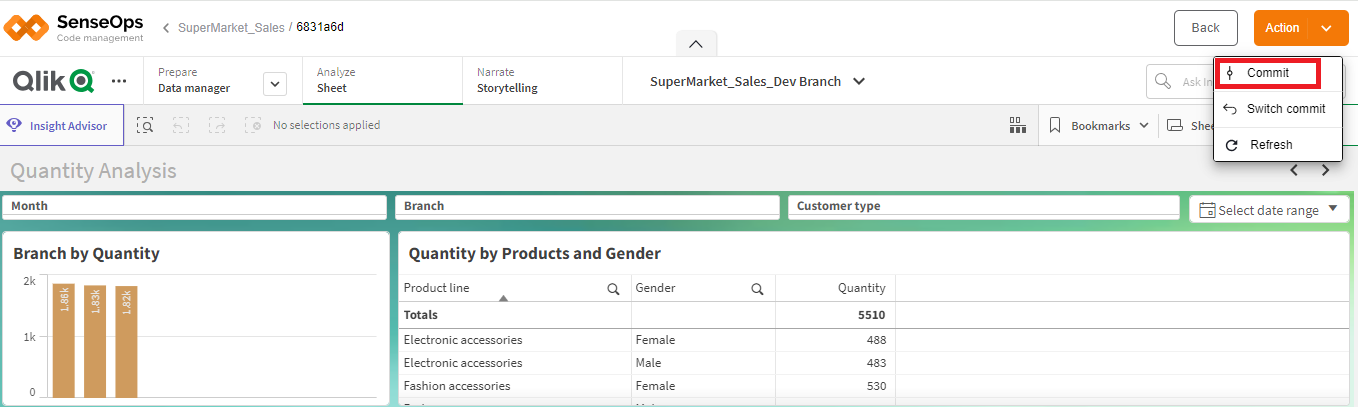
- Save your modifications as you progress. Once the changes are finalized,commit them to the repository to preserve the version history and facilitate comparison.
3. Comparing with Master Branch:
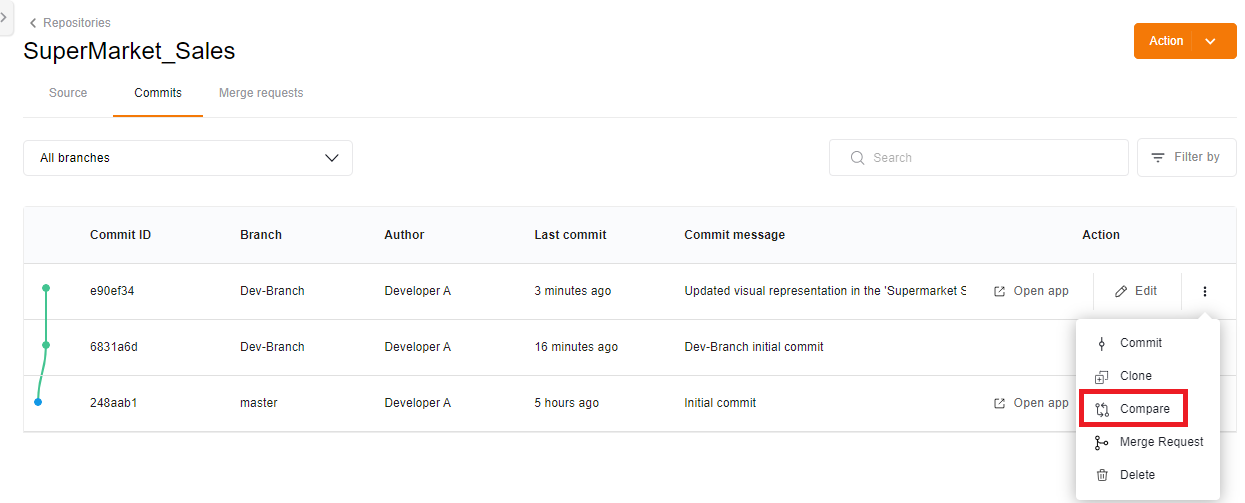
- To check the compatibility and consistency of your changes with the master branch, return to the repository page.
- Here, you can view the newly created version with a new commit ID. Click on the 'compare' option available in the action menu to proceed with the comparison.
4. Specifying Comparison Parameters:
- In the sliding window that appears, specify the source and destination branches, along with the respective commits you wish to compare.
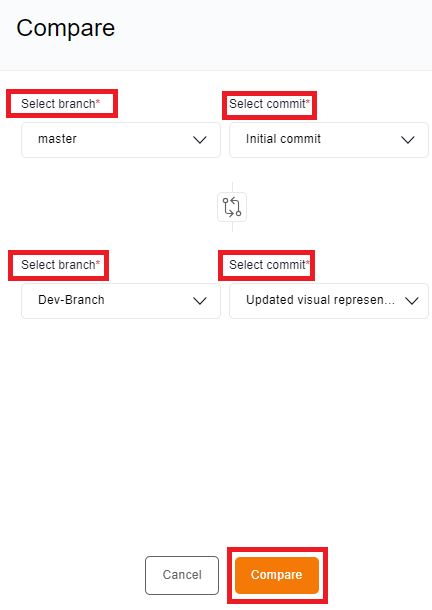
- Click on the 'Compare' button to proceed. Upon clicking, you'll be directed to the compare repositories page, where you can examine various parameters such as dimensions, measures, script, sheets, variables, bookmarks, stories, and app properties.
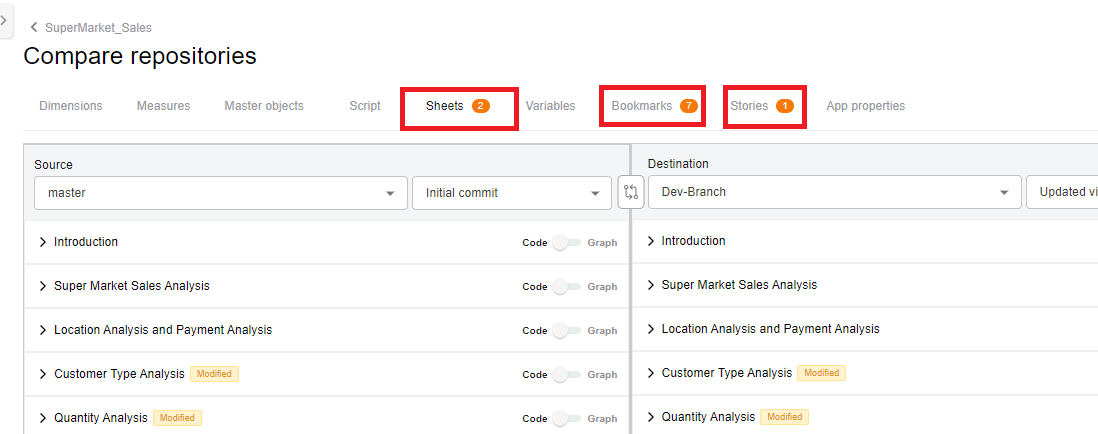
- Focus on the relevant sections where changes have been made, such as sheets comparison in the case of visual modifications.
5. Visualizing Differences:
- The comparison page displays a side-by-side view of the source and destination versions, highlighting modifications.
- For example, within the "Supermarket Sales Analysis" application, in the "Quantity Analysis" sheet, the developer changed the visual representation of "Quantity by Products and Gender" from a bar chart to a table format. This change is visually represented, with the updated version highlighted in green and the original version in red.
- Changes made in other sections, such as script modifications or variable adjustments, are similarly highlighted for easy identification.
6. Resolving Conflicts and Finalizing Changes:
- Analyze the highlighted differences and ensure they align with the intended modifications.
- Resolve any conflicts or discrepancies identified during the comparison process.
- Once satisfied with the changes, proceed to send a merge request to merge your branch into the master branch.
By following this systematic approach to track and compare changes in Qlik Sense applications, developers can streamline the integration process, minimize errors, and maintain the overall quality and consistency of their codebase.