Installation
Overview
The installation guide for the code management product provides step-by-step instructions from setup to launch, covering prerequisites, downloading, file extraction, and execution. Once completed, users can access the product to enhance their code management endeavors.
Installation of Code Management follows the stages outlined here:
Getting Your System Ready
- You'll need a SenseOps account to download the Code Management product. If you don't have a SenseOps account visit senseops.com and click My Account. Refer to Account Creation for guidance.
- Ensure installation of the latest versions of Node.js and GIT Server.
- PostgreSQL, typically installed alongside the Qlik Sense application, is also required.
- Maintain port 4040 free from any other applications or services during installation.
Fetching and Extracting Assets
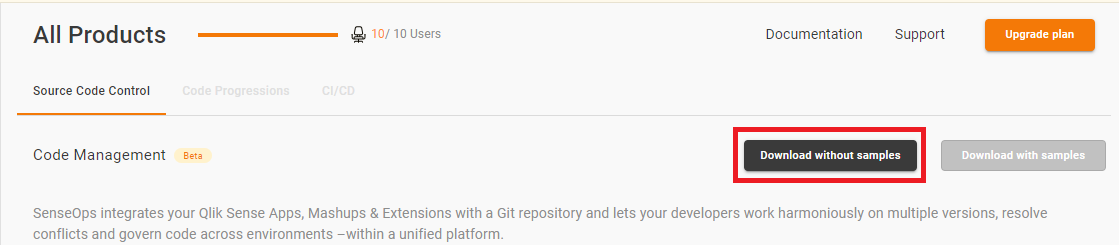
Step 1: Select Code Management, click "Download without samples" and download the SenseOpsCodeManagement_Beta.zip file.
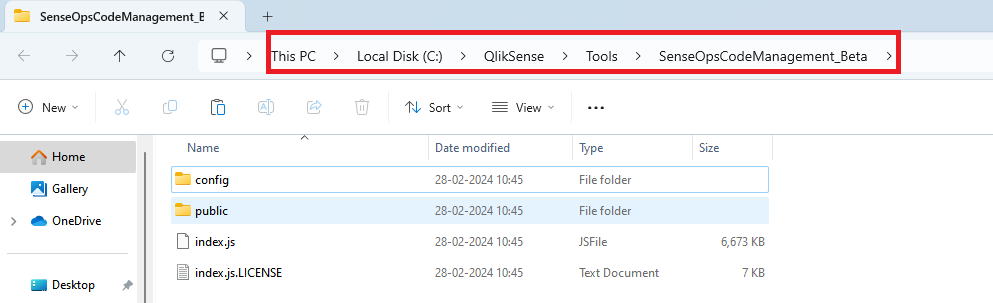
Step 2: Navigate to the Qlik Sense shared foleder and create a separate folder, for instance "Tools" and extract the zip contents into it. Ensure that the recommended path for extraction is followed which should be < Qlik Sense Shared folder >\Tools\ SenseOpsCodeManagement_Beta
Establishing and Launching the Product
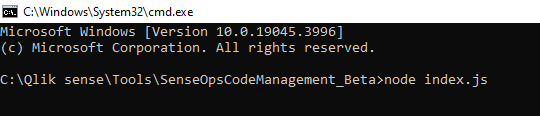
Step 1: Open the terminal or command prompt as an administrator and navigate to the extracted folder and run the index.js file by typing node index.js.
Step 2: After running the index.js file, you’ll receive a message confirming that the server has started at port 4040. Access the product by typing http://localhost:4040 in your browser. This will open the Database Configuration page.
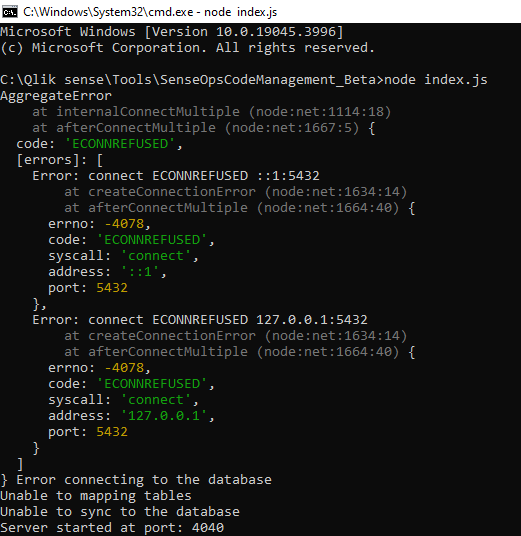

Step 3: Provide the necessary database details and click "Test Connection". If the connection test fails or the server appears to be down, ensure that the server is up by typing the command node index.js in the terminal or command prompt to restart it.

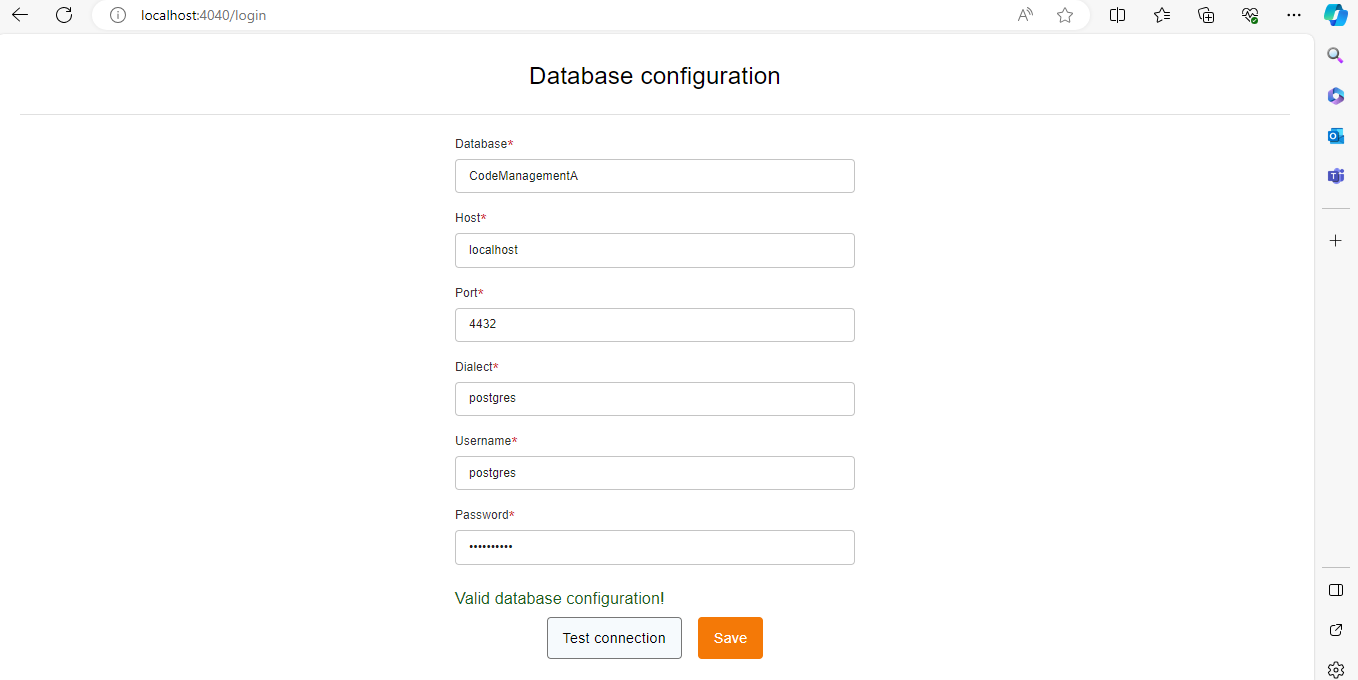
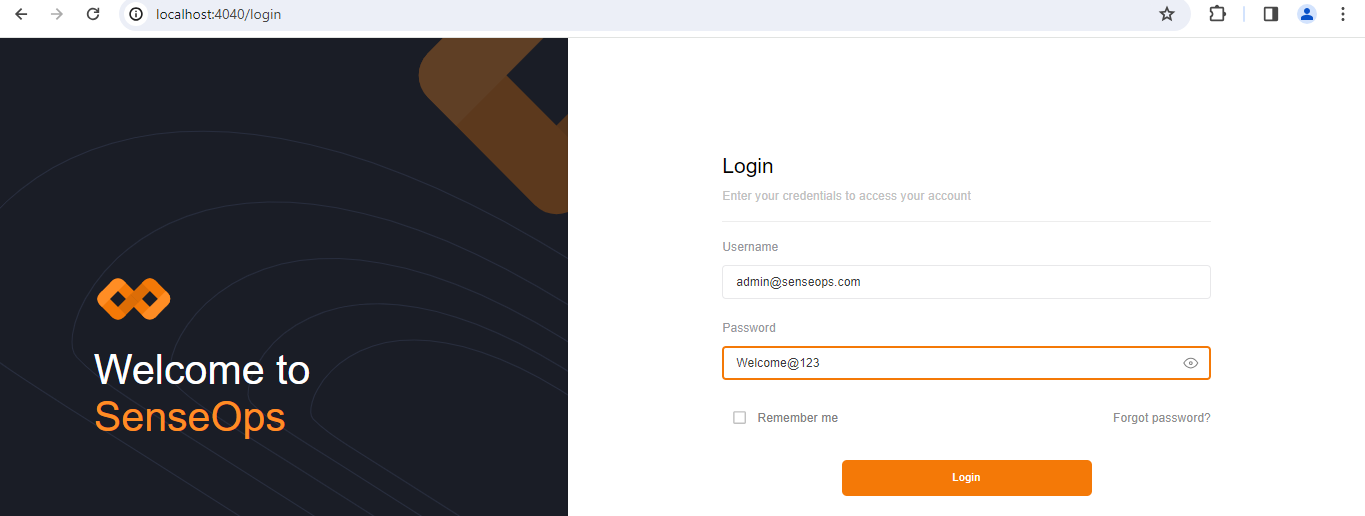
Step 4: Upon successful connection, you'll see a message confirming the validity of the database configuration. Now click on Save to proceed. You'll then be redirected to the login page. Log in using the following default credentials:
Password: Welcome@123
Remember, these credentials can be modified later for your convenience and security.
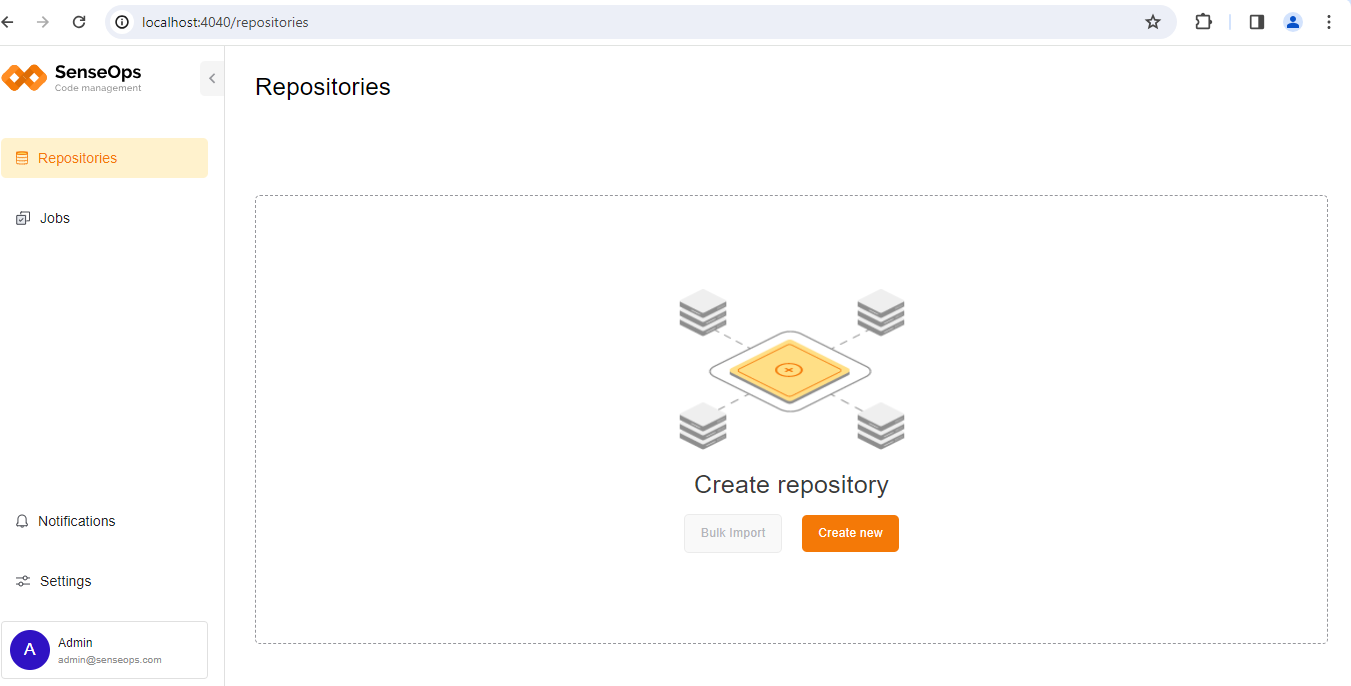
Upon successful login, you'll land on the Repositories page, marking the completion of the installation process. This page serves as the primary interface for accessing and managing the product. Begin your exploration now!